Hardware In The Loop Simulation
Hardware in the loop simulation is using a physical device, such as a supported co-processor running PhotonVision, to enhance simulation capabilities. This is useful for developing and validating code before the camera is attached to a robot, as well as reducing the work required to use WPILib simulation with PhotonVision.
Before continuing, ensure PhotonVision is installed on your device. Instructions can be found here for all devices.
Your coprocessor and computer running simulation will have to be connected to the same network, like a home router. Connecting the coprocessor directly to the computer will not work.
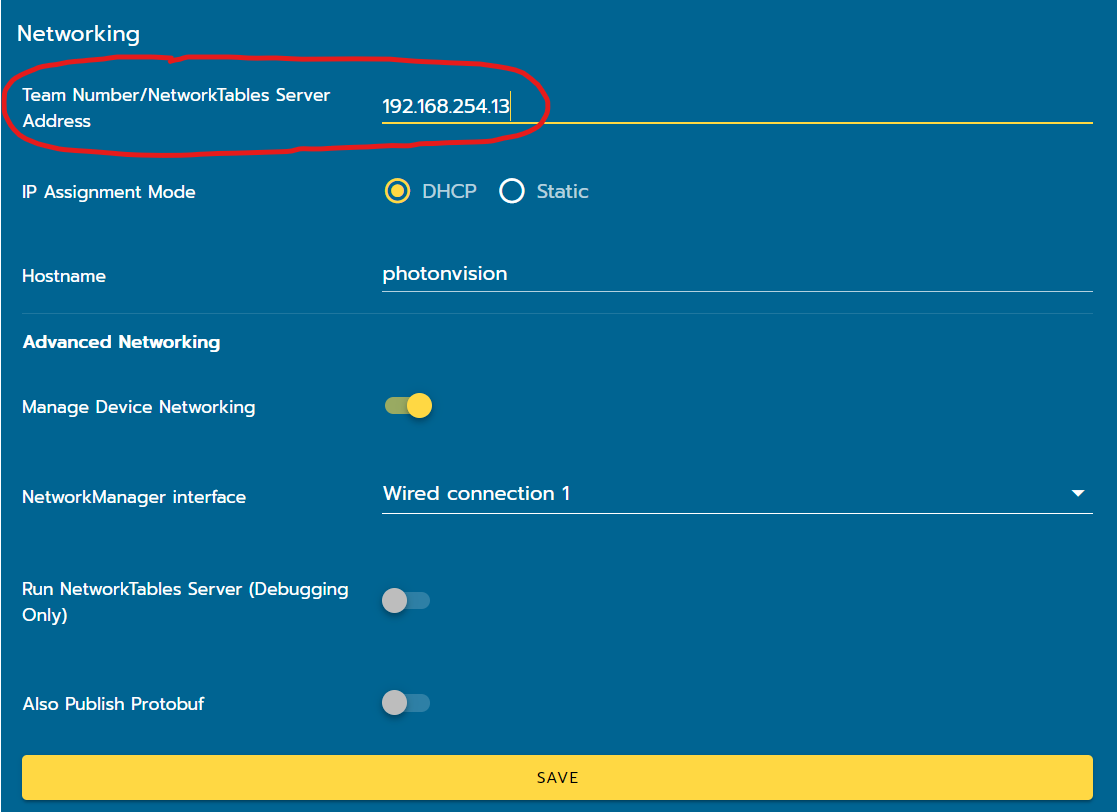
To simulate with hardware in the loop, a one-line change is required. From the PhotonVision UI, go to the sidebar and select the Settings option. Within the Networking settings, find “Team Number/NetworkTables Server Address”.
During normal robot operation, a team’s number would be entered into this field so that the PhotonVision coprocessor connects to the roboRIO as a NT client. Instead, enter the IP address of your computer running the simulation here.
Note
To find the IP address of your Windows computer, open command prompt and run ipconfig.
C:/Users/you>ipconfig

Windows IP Configuration

Ethernet adapter Ethernet:

   Connection-specific DNS Suffix  . : home
   Link-local IPv6 Address . . . . . : fe80::b41d:e861:ef01:9dba%10
   IPv4 Address. . . . . . . . . . . : 192.168.254.13
   Subnet Mask . . . . . . . . . . . : 255.255.255.0
   Default Gateway . . . . . . . . . : 192.168.254.254
No code changes are required, PhotonLib should function similarly to normal operation.
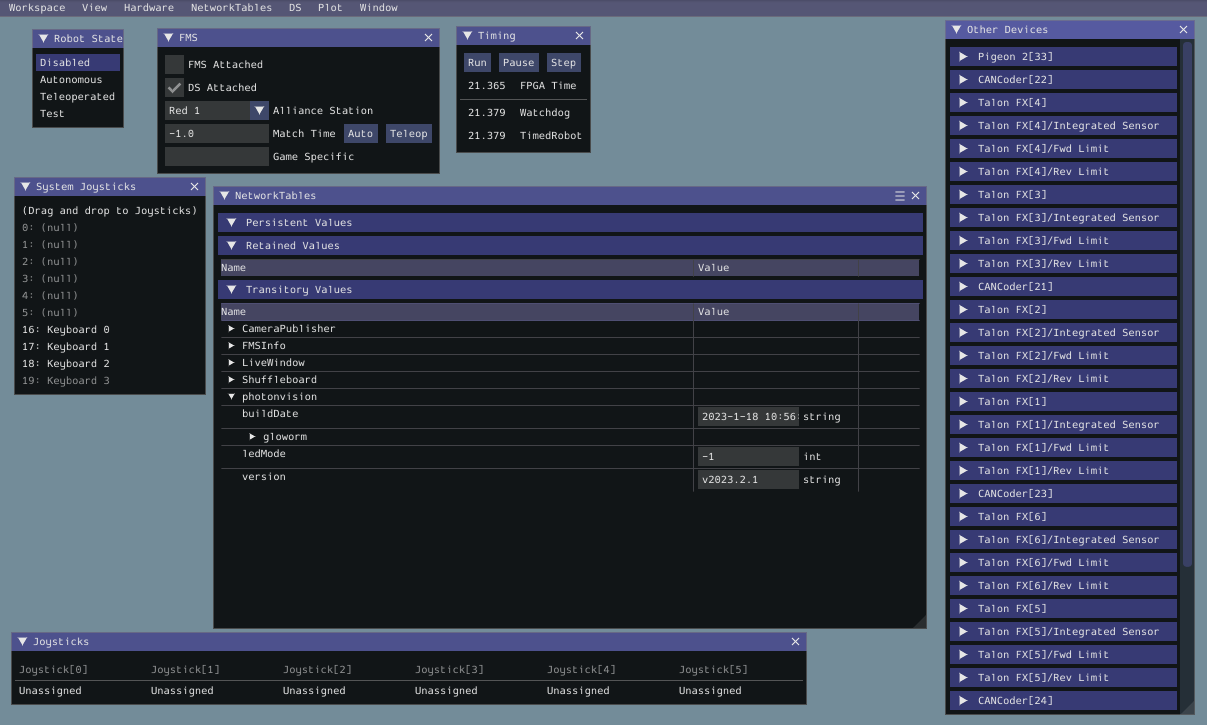
Now launch simulation, and you should be able to see the PhotonVision table on your simulation’s NetworkTables dashboard.