Networking
Physical Networking
Note
When using PhotonVision off robot, you MUST plug the coprocessor into a physical router/radio. You can then connect your laptop/device used to view the webdashboard to the same network. Any other networking setup will not work and will not be supported in any capacity.
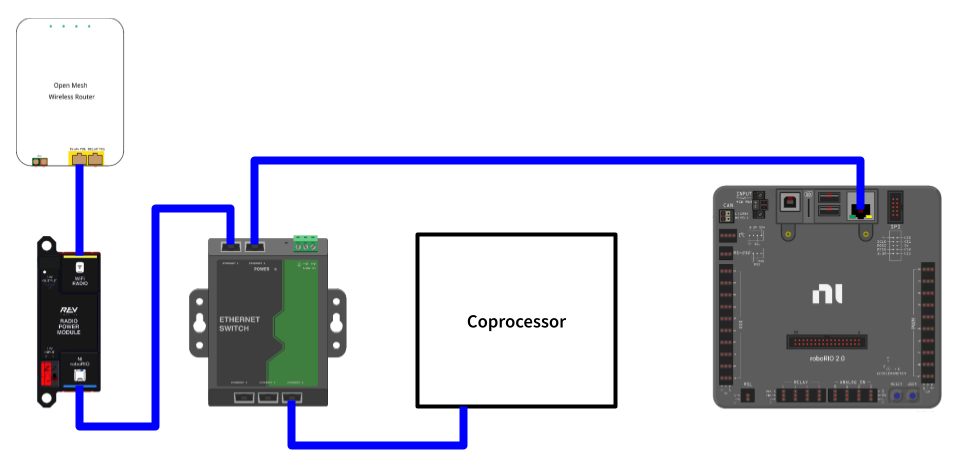
After imaging your coprocessor, run an ethernet cable from your coprocessor to a router/radio and power on your coprocessor by plugging it into the wall. Then connect whatever device you’re using to view the webdashboard to the same network and navigate to photonvision.local:5800.
PhotonVision STRONGLY recommends the usage of a network switch on your robot. This is because the second radio port on the current FRC radios is known to be buggy and cause frequent connection issues that are detrimental during competition. An in-depth guide on how to install a network switch can be found on FRC 900’s website.
Digital Networking
PhotonVision STRONGLY recommends the usage of Static IPs as it increases reliability on the field and when using PhotonVision in general. To properly set up your static IP, follow the steps below:
Warning
Only use a static IP when connected to the robot radio, and never when testing at home, unless you are well versed in networking or have the relevant “know how”.
Ensure your robot is on and you are connected to the robot network.
Navigate to
photonvision.local:5800(this may be different if you are using a Gloworm / Limelight) in your browser.Open the settings tab on the left pane.
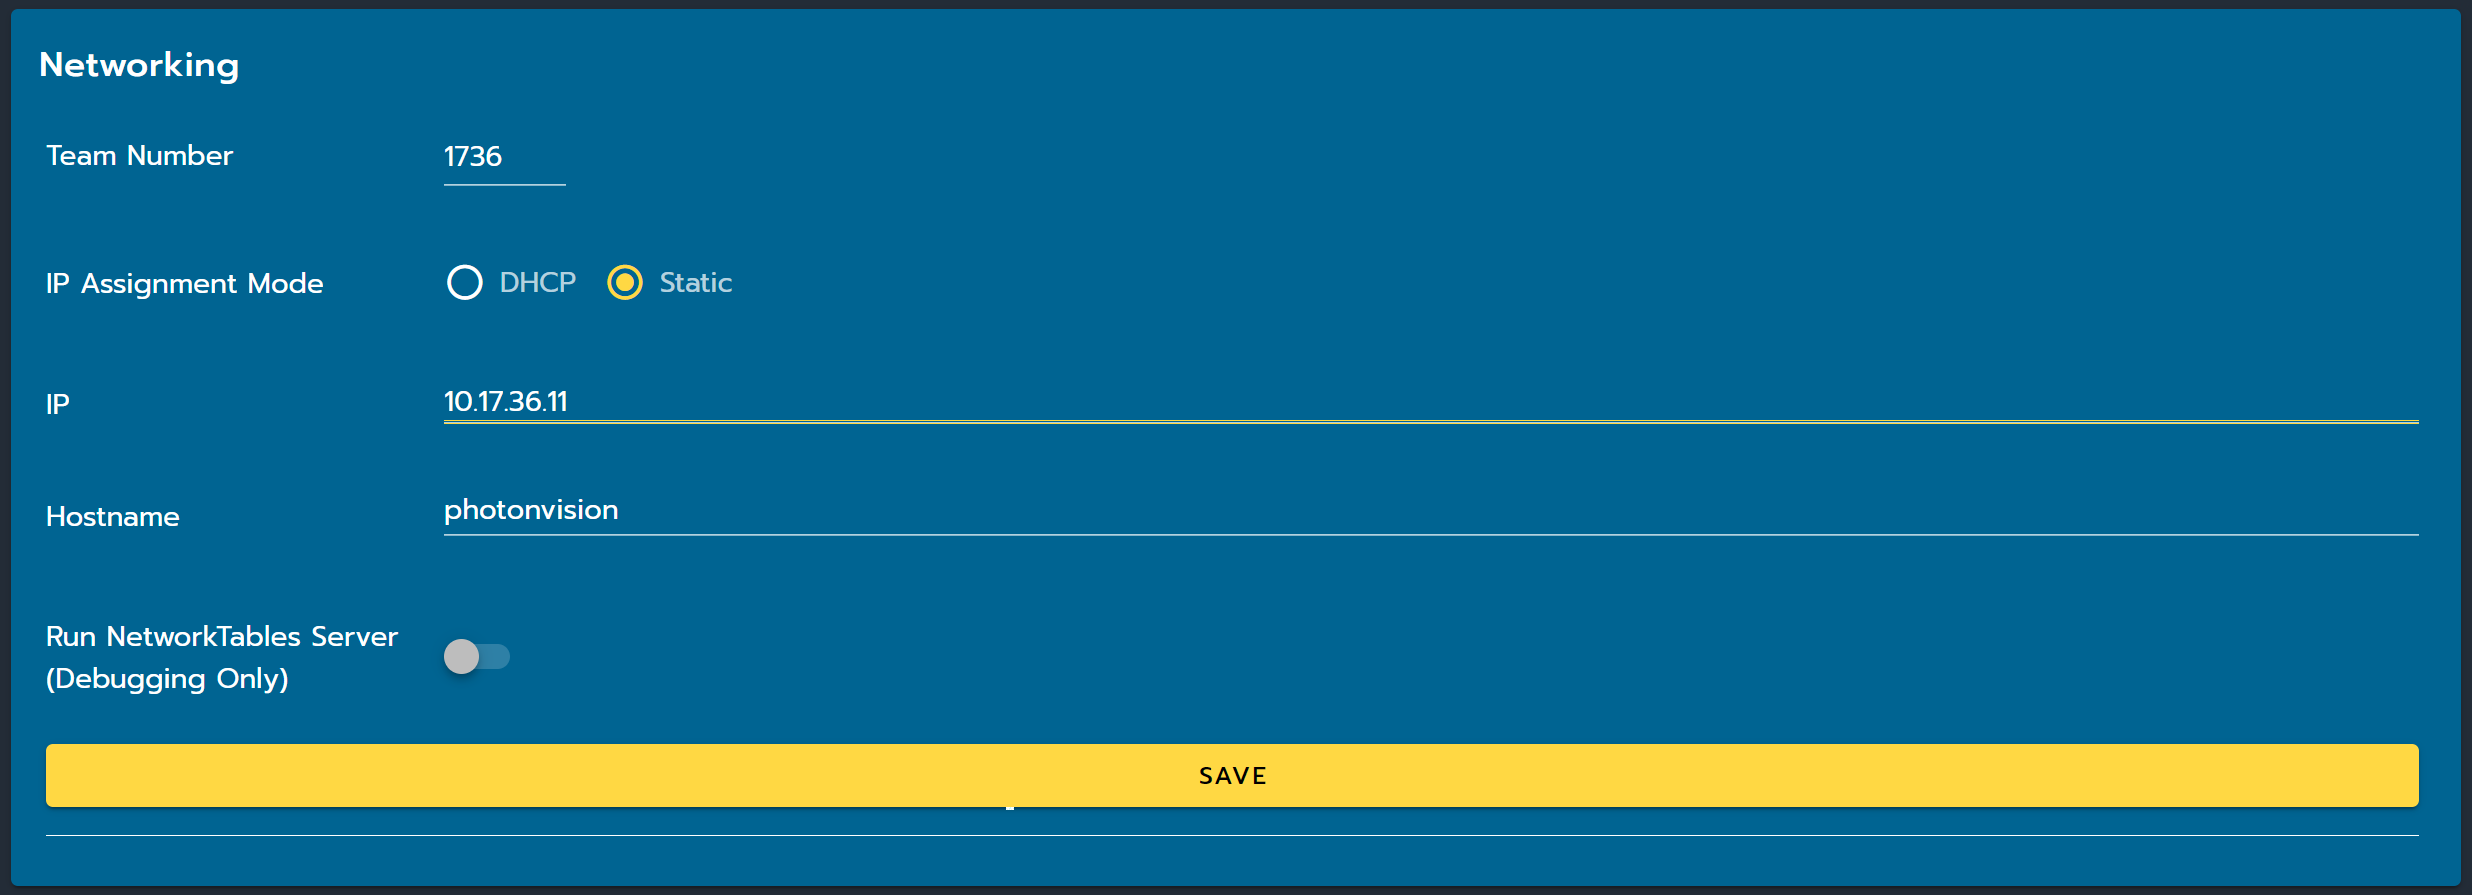
Under the Networking section, set your team number.
Change your IP to Static.
Set your coprocessor’s IP address to “10.TE.AM.11”. More information on IP format can be found here.
Click the “Save” button.
Set your roboRIO to the following static IP address: “10.TE.AM.2”. This can be done via the roboRIO web dashboard.
Power-cycle your robot and then you will now be access the PhotonVision dashboard at 10.TE.AM.11:5800.
Port Forwarding
If you would like to access your Ethernet-connected vision device from a computer when tethered to the USB port on the roboRIO, you can use WPILib’s PortForwarder.
PortForwarder.add(5800, "photonvision.local", 5800);
wpi::PortForwarder::GetInstance().Add(5800, "photonvision.local", 5800);
Note
The address in the code above (photonvision.local) is the hostname of the coprocessor. This can be different depending on your hardware, and can be checked in the settings tab under “hostname”.
Camera Stream Ports
The camera streams start at they begin at 1181 with two ports for each camera (ex. 1181 and 1182 for camera one, 1183 and 1184 for camera two, etc.). The easiest way to identify the port of the camera that you want is by double clicking on the stream, which opens it in a separate page. The port will be listed below the stream.