Romi Installation
The Romi is a small robot that can be controlled with the WPILib software. The main controller is a Raspberry Pi that must be imaged with WPILibPi .
Installation
The WPILibPi image includes FRCVision, which reserves USB cameras; to use PhotonVision, we need to edit the /home/pi/runCamera script to disable it. First we will need to make the file system writeable; the easiest way to do this is to go to 10.0.0.2 and choose “Writable” at the top.
SSH into the Raspberry Pi (using Windows command line, or a tool like Putty ) at the Romi’s default address 10.0.0.2. The default user is pi, and the password is raspberry.
Follow the process for installing PhotonVision on “Other Debian-Based Co-Processor Installation”. As it mentions this will require an internet connection so plugging into the ethernet jack on the Raspberry Pi will be the easiest solution. The pi must remain writable!
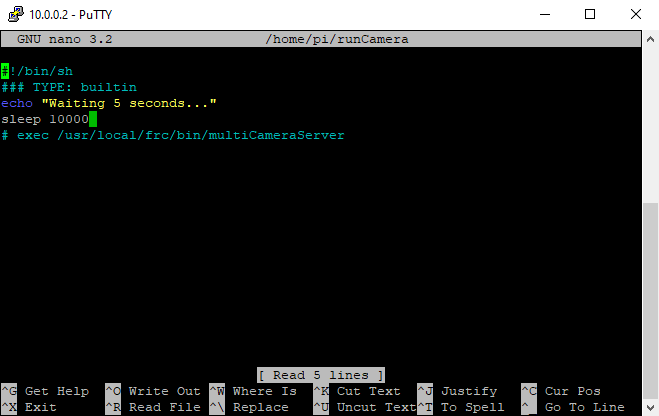
Next, from the SSH terminal, run sudo nano /home/pi/runCamera then arrow down to the start of the exec line and press “Enter” to add a new line. Then add # before the exec command to comment it out. Then, arrow up to the new line and type sleep 10000. Hit “Ctrl + O” and then “Enter” to save the file. Finally press “Ctrl + X” to exit nano. Now, reboot the Romi by typing sudo reboot.
After it reboots, you should be able to locate the PhotonVision UI at: http://10.0.0.2:5800/.
Warning
In order for settings, logs, etc. to be saved / take effect, ensure that PhotonVision is in writable mode.